Introduction:
As car enthusiasts, we understand the importance of protecting our vehicles while maintaining their beauty. That’s why System X Care is here to provide you with an ultimate guide to DIY ceramic coating. In this step-by-step guide, we will share expert tips and techniques for achieving a professional-grade ceramic coating on your car. By following our instructions carefully, you can protect your vehicle’s paint and enjoy a stunning, long-lasting finish. Let’s dive in!

Step 1: Gather the Right Equipment
Before you start the ceramic coating process, make sure you have the necessary equipment. At System X Care, we recommend having a ceramic coating, an applicator, microfiber towels, a clay bar, and a high-quality decontamination spray. These tools will help you achieve optimal results without the need for expensive machinery or polishers.
Step 2: Thoroughly Clean Your Car
Begin by thoroughly cleaning your car to remove any contaminants. You can choose between a hand wash, a waterless wash, or any other method you prefer. The goal is to remove dust, debris, and other particles that can affect the ceramic coating’s adhesion. A clean surface is essential for achieving a flawless finish.
Step 3: Clay Bar to Remove Contaminants
Even after a thorough wash, your car may still have contaminants that are not easily removed. This is where a clay bar comes in. System X Care recommends using a synthetic clay bar, along with a ceramic-based detail spray as a lubricant. By gently rubbing the clay bar across the surface, you can effectively remove any remaining contaminants and ensure a smooth surface for the ceramic coating.
Step 4: Optional Step – Polishing for
Swirl Marks and Scratches If your car has visible swirl marks or scratches, we recommend a polishing step. Use a machine or hand polish to eliminate these imperfections before applying the ceramic coating. By doing so, you prevent sealing in these defects, ensuring a flawless, showroom-like finish.
Step 5: Preparing for Ceramic Coating Application
To ensure a proper bond between the ceramic coating and your vehicle’s surface, use a decontamination spray. System X Care’s recommended product, Ethos Detox, effectively removes any residues or contaminants left behind after the clay bar and polishing steps. Spray it evenly across the surface and wipe it off with a microfiber towel.
Step 6: Applying the Ceramic Coating
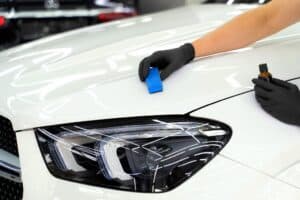
Now comes the exciting part – applying the ceramic coating. Put on a pair of gloves to protect your hands, and make sure you have enough microfiber towels at hand. Apply a small amount of ceramic coating to the applicator and work in small sections. Follow the body lines and ensure even coverage. Allow the coating to flash according to the manufacturer’s instructions, then gently wipe off the excess using a clean microfiber towel.
Step 7: Final Inspection and Touch-Up
Once you’ve completed the application, perform a final inspection to check for any missed spots or high spots. Use the ceramic coating applicator to reactivate any high spots and wipe them off properly. System X Care recommends using ambient lighting during the inspection to ensure a thorough examination.
Conclusion:
Congratulations! You’ve successfully completed the DIY ceramic coating process for your car. Thanks to System X Care’s step-by-step guide, you now possess the knowledge and techniques to protect your vehicle’s paint and achieve a stunning, long-lasting finish. By following these expert tips, you can save money while enjoying professional-grade results. Remember, proper preparation and attention to detail are key to a successful ceramic coating application.

